Your cart

Your cart is empty

LASHES MADE SIMPLE

How to Apply Cluster Lashes and 3/4 Lashes at Home

Applying your own lashes is easier than it looks, and this is where we show you how. These LashMi tutorials cover it all, placing cluster lashes and 3/4 lashes, removing them gently, and making every set last. No glue, no salon, no guesswork.

First time, or just after a cleaner, longer-wearing result? It's all below. Follow the cluster steps, the 3/4 steps, our hot tips, and the gentle removal method. And if you'd like someone to walk you through it, our free 10-minute WhatsApp chat is one message away.

β˜…β˜…β˜…β˜…β˜… 4.99/5 from 200+ reviews

1-2 MINUTES
BEGINNER FRIENDLY
NO SEPARATE GLUE
FEATURED TUTORIAL0:43How to Apply Cluster Lashes and 3/4 Lashes at Home
LET'S KEEP IT SIMPLE

How to Apply Lashes Like a Pro

Here's the honest secret after years of doing this: the people who get salon-worthy results at home aren't more skilled; they just prep better and rush less. Master a few small habits and your lashes will look flawless and last for days. Before you place a single lash, do these three things:

01

Cleanse and fully dry your lash line

Oil is the number one reason lashes lift early, so start clean and make sure the area is completely dry.

02

Curl your natural lashes if they're straight

A quick curl before you begin helps your own lashes blend seamlessly with the clusters and makes the whole application easier.

03

Set up your tools

Keep your Non-Stick Applicator ready, and stage your clusters by length on your Lash Pad so everything's within reach

Get this right, and you're already halfway to a look people assume was done in a salon.

CHOOSE YOUR METHOD

Apply them your way.

How to Apply Lash Clusters

Cluster lashes give you full control over your look, and with a little practice, a full set takes no more than five minutes. This is the exact method our team uses.

STEP 01
STEP 02
01

POSITION

Apply underneath your natural lashes.

02

SECURE

Gently clamp to blend your natural lashes.

How to Apply 3/4 Lashes

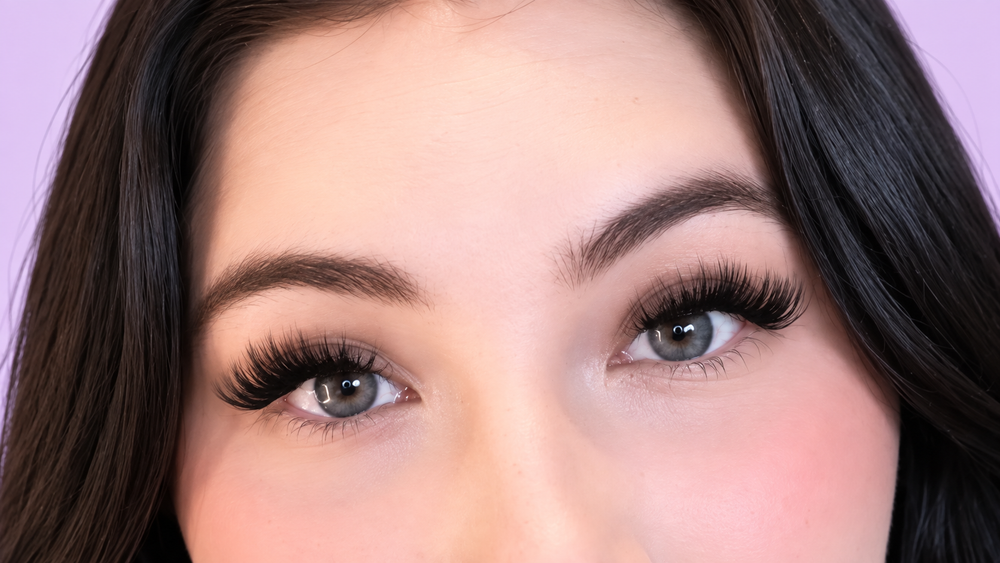
Our 3/4 lashes, also called half lashes, are the fastest look in the range, on in under two minutes with practice. They sit on the outer part of your eye.

OPTION 01 Option 01 GIF
OPTION 02 Option 02 GIF
OPTION 03 Option 03 GIF
01

UNDERNEATH

Apply 3/4 lashes underneath for a seamless finish.

02

ABOVE LASH LINE

Place 3/4 lashes above natural lashes for a bolder look.

03

OUTER CORNER

Focus on the outer edge for a subtle cat-eye lift.

TORI'S TIPs

Hot Tips for Longer-Lasting Lashes

Small habits make the biggest difference to how long your lashes wear and how fresh they stay. These are the tips we share most often:

Gentle & secure β™‘

Curl straight lashes first

If your natural lashes are straight, gently curl them with a lash curler before applying your segments. It makes application easier and helps everything blend seamlessly.

Press to refresh

To extend the life of your lashes, give them gentle fingertip presses every few days. This simple step maintains their hold and keeps them looking fresh for longer.

Give them 24 to 48 hours

Avoid submerging your lashes in water for the first 24 to 48 hours after applying; this helps the hold set and extends their life.

Clean makeup with micellar water

Use micellar water to gently clean off eye makeup around your lashes.

Skip oil-based cleansers while wearing them

Oily products weaken the self-adhesive gel and reduce wear time, so keep them away from the lash line until you're ready to remove.

One extra insider note: weather matters more than people expect. In warmer conditions, heat, sweat, and natural oils gradually loosen the gel, so keeping the eye area clean and dry is what stretches a set toward its full wear.

GENTLE REMOVAL
MAKE EVERY SET LAST

How to Remove Your Lashes Using the Lash Saver Duo

Removal is where damage happens if you rush, so treat it as gently as application. The Lash Saver Duo, our Sensitive Oil Cleanser paired with a Microfibre Cloth, makes it effortless and kind to your natural lashes.

01
APPLY THE OIL
Take the Sensitive Oil Cleanser and either drip one to two drops directly onto your natural lashes, or onto a clean microfibre cloth.
02
MASSAGE GENTLY
Massage the oil gently into your natural lashes to thoroughly cleanse and nourish them, giving it a few seconds to work into the adhesive.
03
LIFT AWAY
Your LashMi segments should easily fall away along with any remaining adhesive, no pulling or tugging needed. If a lash resists, add another moment rather than forcing it.
04
CLEAN & STORE
Use the clean Microfibre Cloth to gently wipe and clean your lashes, removing any residual oil or debris. Make sure to remove all oil if you plan to reapply, since any residue will stop fresh adhesive from gripping.
NEED TO KNOW

Frequently Asked Questions

Still unsure? Our complimentary 10-minute WhatsApp chat is here for you.

Chat with a LashMi expert →
How do I apply cluster lashes on myself?
Stage your clusters on a lash pad, then use a non-stick applicator to place each one beneath your natural lashes, about 1mm above the waterline. Press to blend, working outer corner inward.
How do I apply 3/4 or half lashes?
Pick the lash up with your applicator, then either place it close to your lash line, or set it underneath and blink to attach. Press to secure. It takes under two minutes with practice.
How do I remove my lashes without damage?
Drip one to two drops of Sensitive Oil Cleanser onto your lashes, massage gently, and the segments release on their own. Wipe clean with the microfibre cloth.
Why aren't my cluster lashes sticking?
It's almost always oil or moisture. Cleanse and fully dry your lash line first, and avoid oil-based products around the lashes while wearing them.
How do I make my lashes last longer?
Curl straight lashes first, avoid water for 24 to 48 hours, press gently every few days, and keep oil-based cleansers away from the lash line.